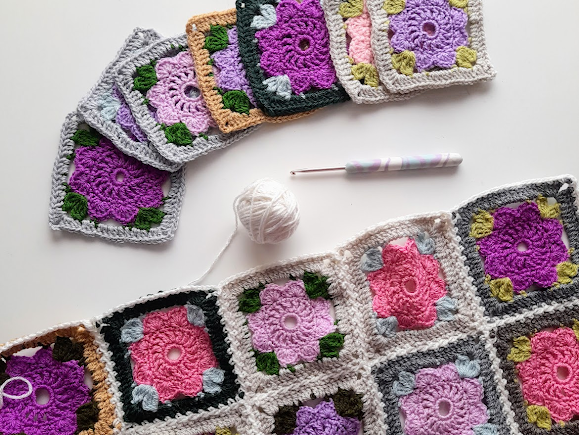
There are multiple ways to join granny squares, sewing them together, with single crochet, slip stitch them together too, but my favorite one is joining them with an "additional" round in one continuos go without cutting the yarn. This method is called "continuous join as you go" and there are plenty of videos how to do that with the traditional granny square stitch (3 dc, ch 1) , the tight version with only double crochet and even some lacey ones with only chains or "V" stitch.
For my "Fairy Garden" blanket I wanted something in between. Some delicate lacey looking stitch but not too open. So here is what I made for my design. Hope you like it and find this photo tutorial helpful.
You can use this same joining for any granny square pattern with odd amount of stitches in the sides and ch 3 corners.
Joining as you go
We will start from the bottom rigth corner adding squares to the left until complete the bottom row, then join the upper row from the left to the right, and so on until finish in the left upper corner of the blanket. Then, add the left and botton border to the whole blanket.
Step 1: Attach the yarn in any corner of your bottom right granny square, * sc in the same corner, (ch 1, skip 1 stitch, sc in the next stitch) x 9, ch 1, sc in the next corner, ch 3** From * to ** represent one solid line in the graph above.
Step 2: repeat from * to ** 2 more times.
Step 3 (picot): sc in the second ch, ch 1.
Now is time to join the next square that represents the dotted lines in the graph.
Step 4: First pull the loop in the hook, take off the hook and hold the loop with your hand. Insert the hook in the last sc made in the last granny square. Pull the loop through the stitch.
Keep repeating the step 6 until you reach the corner.
Step 7: turn the work and sc in the ch 3 space from the last granny square corner, ch 1, turn.
Step 8: * sc in the corner for the new granny square,
(ch 1, slip 1 stitch, sc in the next stitch) x 9, ch 1, sc in the next corner, ch 3 ** Repeat from * to ** 2 times.
Keep repeating steps 3 to 8 until you join the last granny square of your row. Then, repeat * to ** once from step 8.
THE NEXT STAGE IS JOINING THE NEXT GRANNY SQUARE IN THE TOP OF THE LAST GRANNY SQUARE TO START THE SECOND ROW.
Step 9: to join the first square from the next row, work the step 3 (picot).
Step 10: work the joining method as explained in steps 4, 5 and 6.
Step 11: once you reach the corner, turn the work and ss in the sc explained in step 7 when joining the granny square corners, ch 1 and turn.
Step 12: repeat step 10 and 11 to join each granny square of the row.
Step 13: repeat step 7 to join the corners from the rows at the end.
Step 14: repeat step 1 and step 2, ch 1 in the last corner instead of 3.
Step 15: slip stitch in the sc made to join the squares in the previous row, ch 1.
Step 16: keep joining the sides of the granny squares in the same way from the previous row changing the step 3 for step 15.
Keep repeating steps 9 to 16 to add the next rows of granny squares until you reach the top left corner of your last granny square.
Step 17: As last step for the joining, we will work in the left and bottom sides of the blanket. First sc in the same corner, turn your work. * (ch 1, skip 1 stitch, sc in the next stitch) x 9, ch 1, sc in the next corner, ch 1, Slip stitch into the picot stitch from the joining, ch 1, sc in the next corner**
Repeat from * to ** until you work the last picot stitch from the left side.
(ch 1, skip 1 stitch, sc in the next stitch) x 9, ch 1, sc in the next corner, ch 3, sc in the same corner.
Repeat from * to ** until you work the last picot stitch from the bottom side.
(ch 1, skip 1 stitch, sc in the next stitch) x 9, ch 1, sc in the next corner, ch 3, slip stitch in the first sc of the joining.
Now that you've connected all the squares and the base for the border. Consider adding an extra row of sc, ch1 around to straighten the joints a bit more. Alternatively, you can directly incorporate your preferred border.
If you choose to add one more row, follow these steps: slip stitch in the next ch space, ch 1, sc in the same ch 1 space, work ch 1, sc into each ch space. Don’t skip the ch spaces between the joining corners of the squares.
In the corners, work sc, ch 3, sc in the same corner.
In the last corner, work sc, ch 3, sc in the same corner, ch 1, slip stitch to join in the first sc.
Hope you find this post helpful and can use it in your next blanket. Since I learned to use this method, it's my go-to when joining granny squares.
If you're interested in the complete pattern for this blanket, it's available here for free, or you can purchase it in my Etsy, Ravelry, and Lovecrafts stores as a ready-to-print PDF with access to some videos and more useful information.


